Finished putting up drywalls
Finally got to put the drywalls up – life got in the way and took my time from railroading, meh.

Exploring the World of Model Railroading
Finally got to put the drywalls up – life got in the way and took my time from railroading, meh.
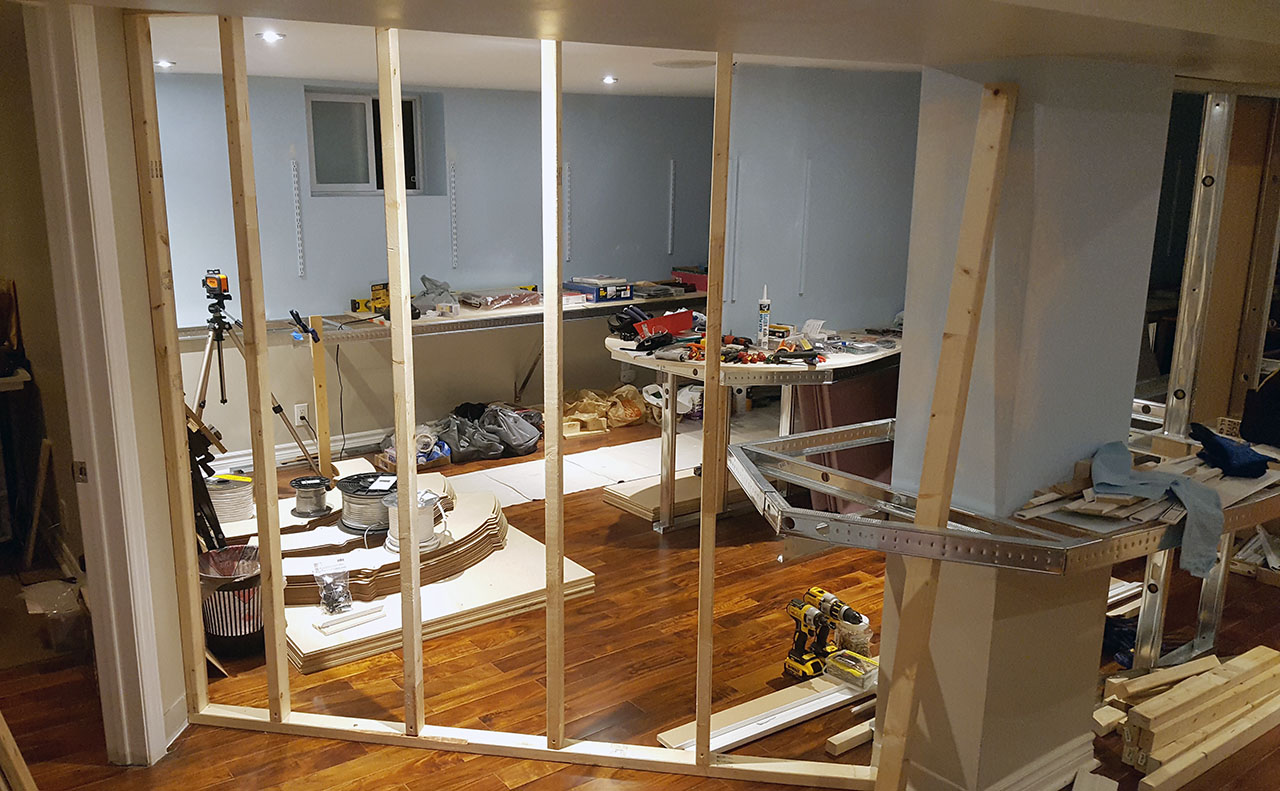
I thought to take an opportunity of a mild (~10C) and dry weather this afternoon, so after a visit to a local home despot for wood and drywall, I went ahead to frame the diagonal wall on the left side of the layout room. This was an almost 7 ft. opening that had to be closed first if I was to begin (finish?) any benchwork construction in that area.
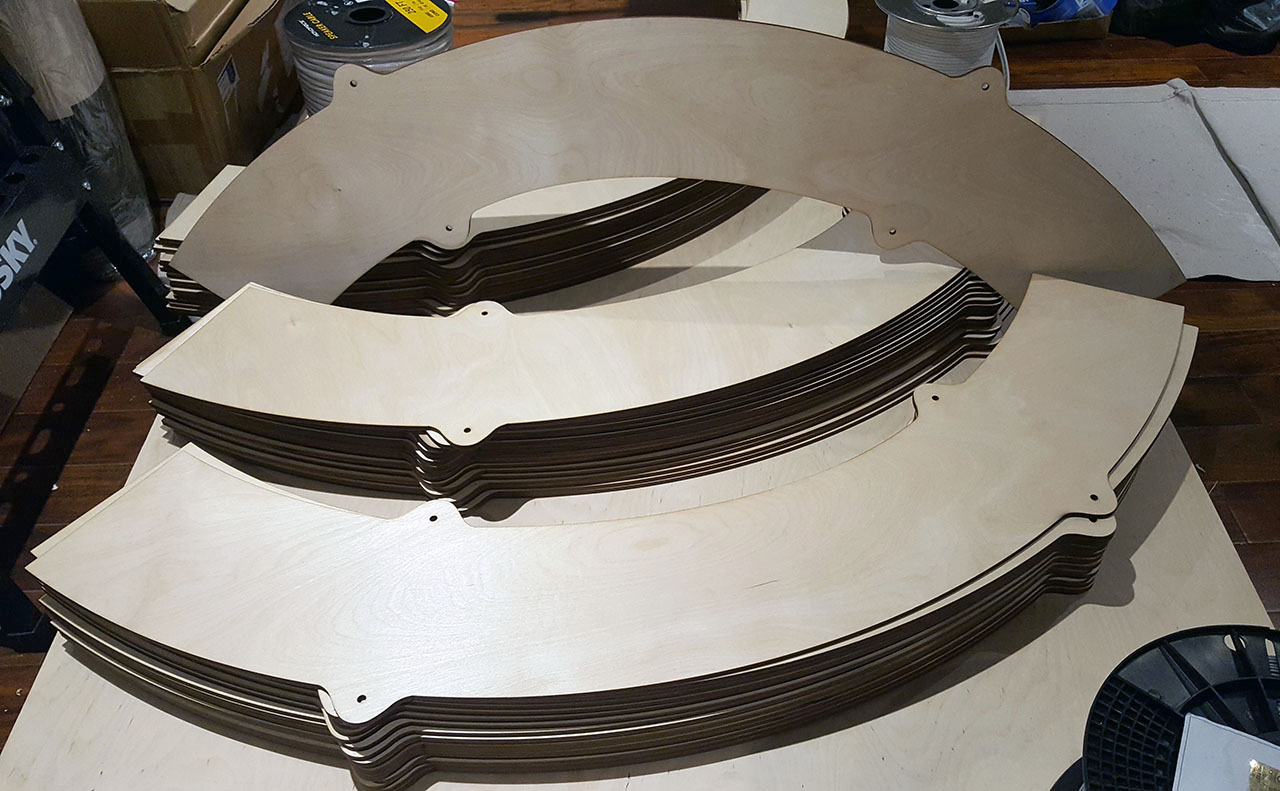
I sent my helix segment design to be laser cut this past Monday, and the local company made them pretty quick, having completed the job in only couple of days, awesome! And what a beauty they are, I am so happy that I did not go with my own materials (which were not marine grade), or god forbid cut the segments myself with a jigsaw.
Past several weeks have been spent building the closet area that my spouse had been waiting for (what seems an eternity). It was a slow process as I only had couple of hours after work, and then couple of weekends, of free time. At the end, it turned out nice and my SO is happy with the looks. Still need to put some shelving inside, although I do not foresee any issues with that (might re-use the sub-roadbed that was in this area originally).
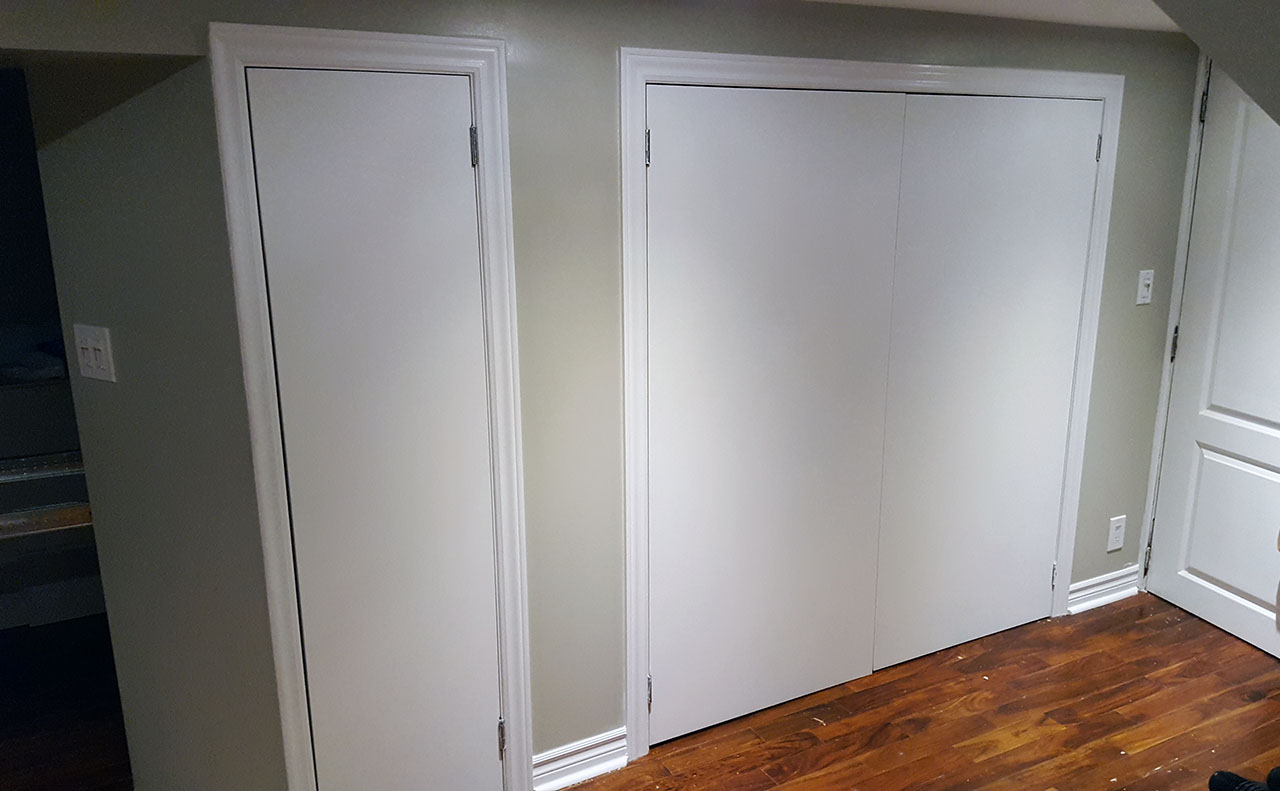
Finshed closet area, the layout entrance is to the left (I also moved two light switches for that area next to the entrance, they were before to far right next to the door)
This took me a while to do, with a lot of tweaking and adjusting. Perhaps it was the use of rudimentary tools to make this (no CAD program) or my inability to focus (too many distractions elsewhere). Alas, here’s what a segment looks like:

Hard to believe, but I have a layout shape I actually intend to see through completion. Granted, most of the benchwork is already built, but this last mile was a real killer for me (figuring out relationship between staging and my railroad, geometry of the staging deck, where to put an entrance to the layout space, and half a dozen other things). Not to mention that earlier this year I switched scales and went (back) to H0 from N that I have been planning to build.
I wanted to re-use as much, if not all of the benchwork I already have, plus stick with the layout shape that is in place (around the walls and a peninsula on the center). Stumbling stone was the helix location and how it ties into the layout plus available space for it.
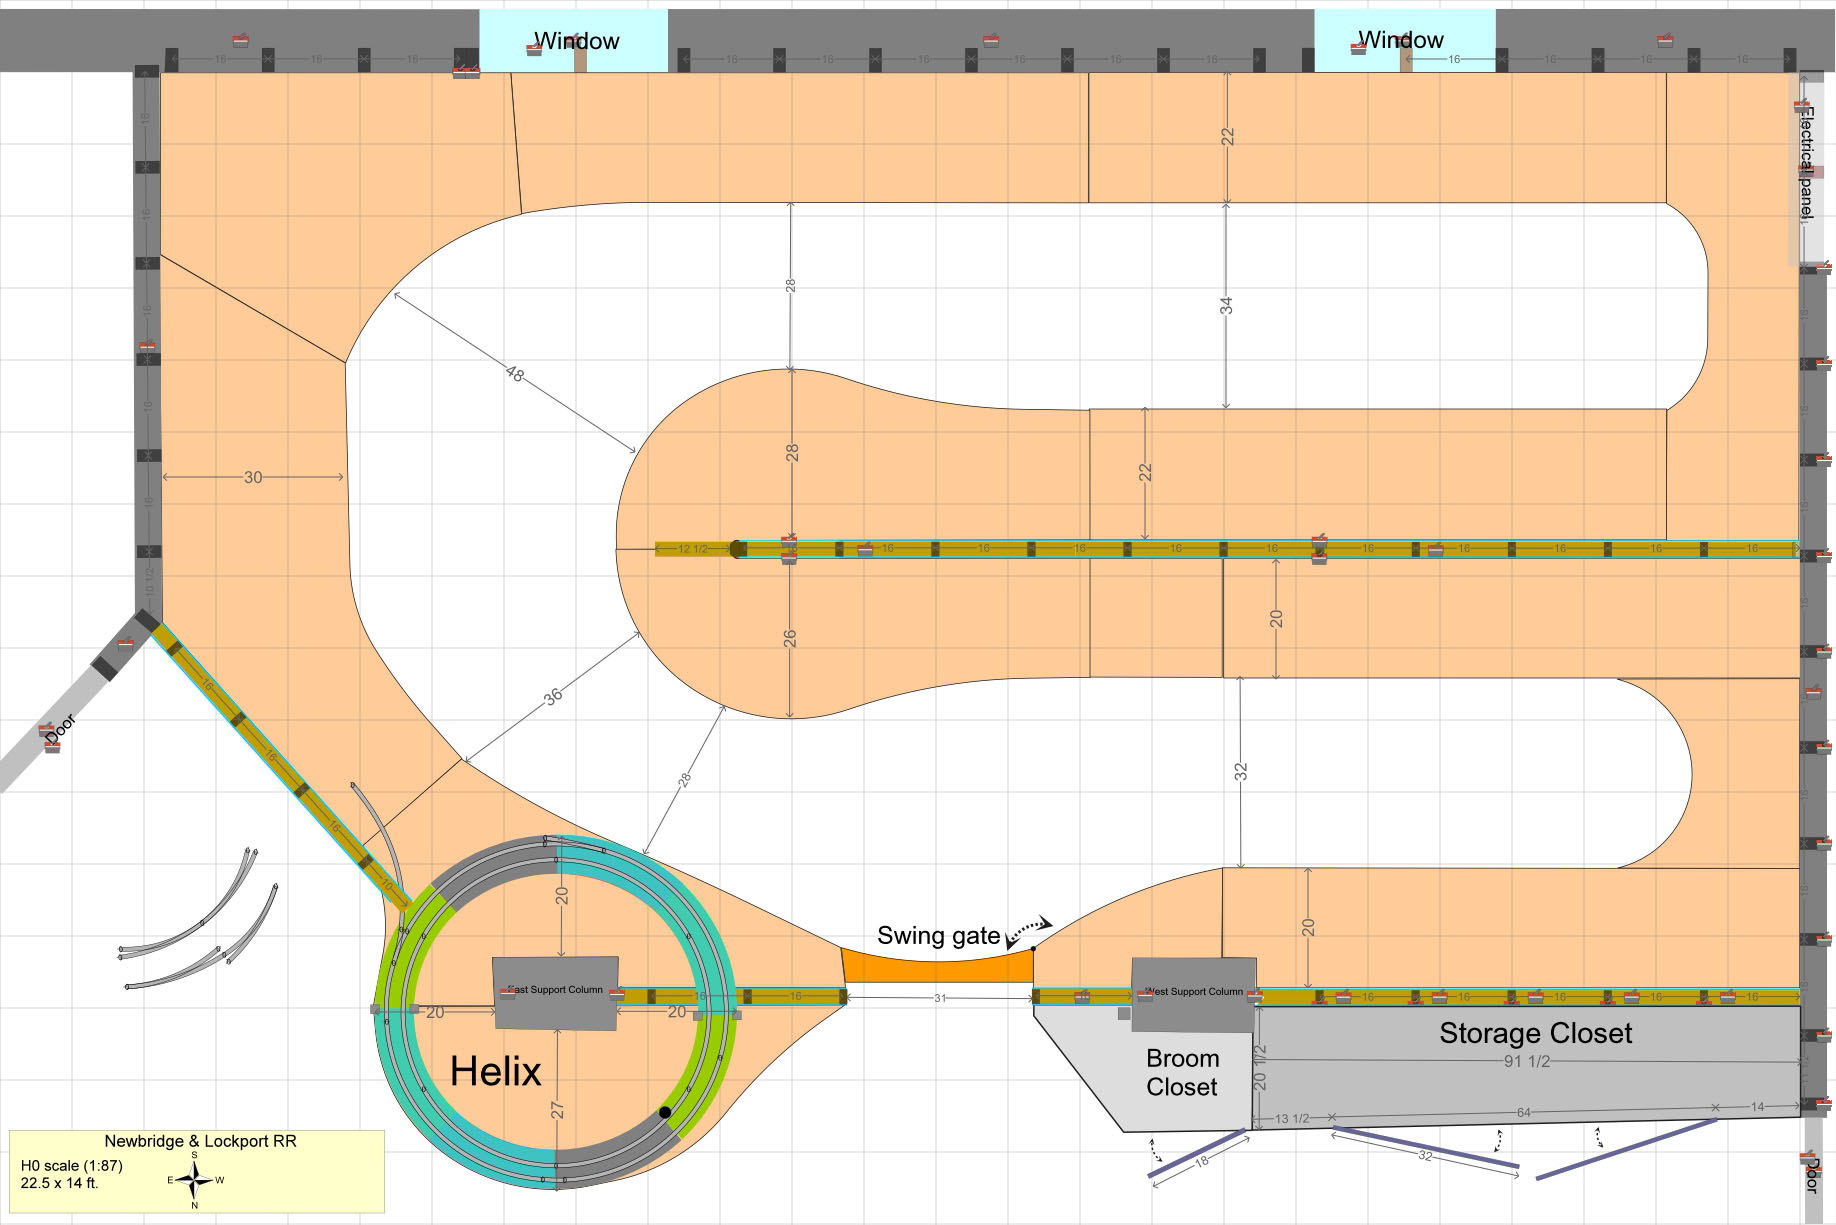
It’s been a while since the last post here, partially due to Summer (house maintenance, etc.) and partially because I did not have a direction. That is not to say I did not spend a lot of free time trying all kinds of various way to squeeze a 5 ft wide square through a 2 ft wide circle, figuratively speaking. I did come up with what I believe to be final helix dimensions, among other things.